To complete this setup, it’s best to have your Clarity Space® and Canvas accounts open separately on your computer ideally in two windows side-by-side. This will make it easier to move between the two platforms as you complete each step.
Below, you’ll find a simple, step-by-step guide walking you through the Canvas integration process so you can connect your accounts and get your assignments organized in Clarity Space®.
Step 1
In the left-hand menu, click Settings.

Step 2
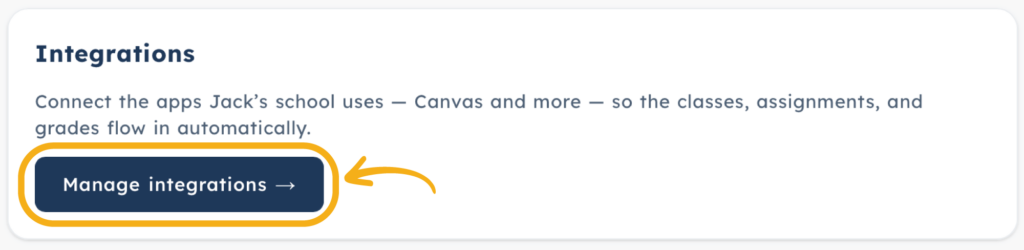
Scroll down the page to the Integrations section and click the button ‘manage integrations’.
Step 3
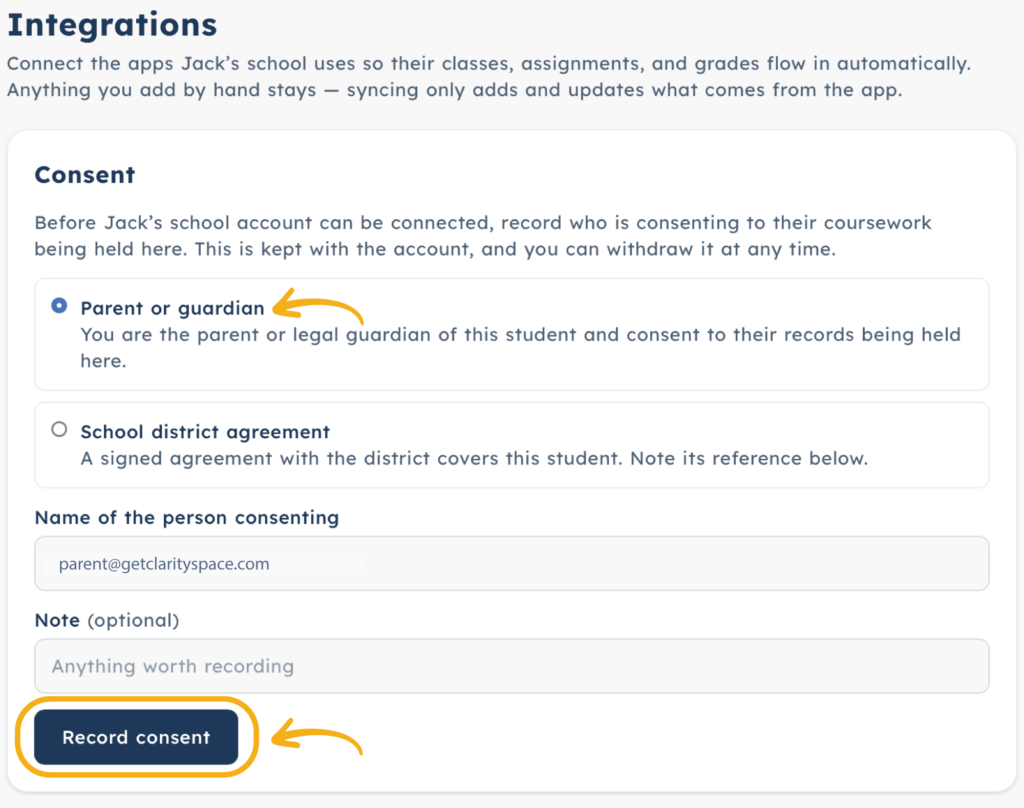
Scroll down to the Consent section and provide your consent for Clarity Space® to access your student’s school data from Canvas and then click ‘Record Consent’.
Step 4
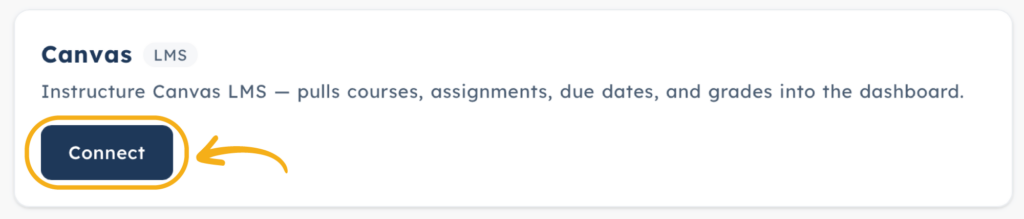
Scroll down to the Canvas section and click the button ‘connect’. This will expand the section for you to complete the Canvas integration.
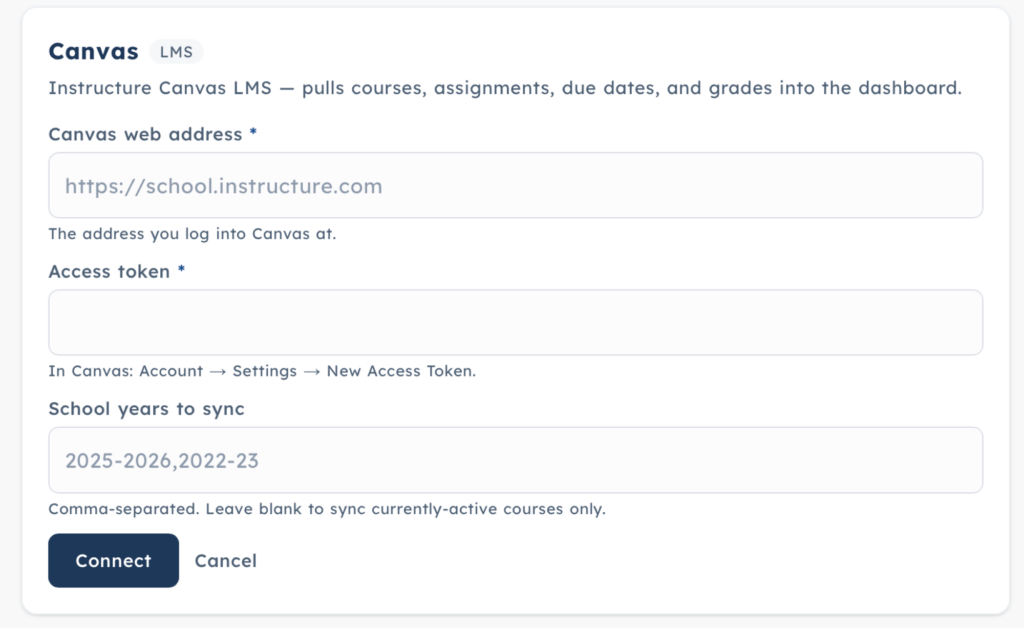
Your Canvas section should now look similar to the image below.
Next, open a separate browser window and log in to your Canvas account. You’ll need to access your Access Token, which will allow Clarity Space® to securely connect with your Canvas account.
Step 5
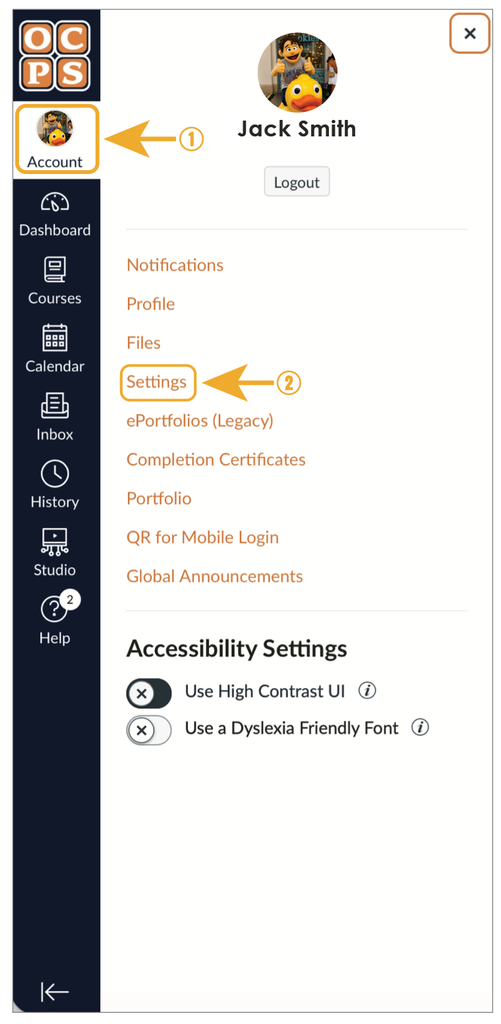
Once you’re logged in to your Canvas account, click Account in the left-hand menu, then select Settings.
Step 6
Scroll down to the Approved Integrations section and click the button ‘+ New Access Token’.

Step 7
Complete the pop-up form, as seen below. Your purpose title should be Clarity Space®. Your expiration date and time should be 90 days from the day that you are completing the form.

Once the form is complete click the button ‘Generate Token’. It should look like the image below.

Step 8
Copy the provided token.

Step 9
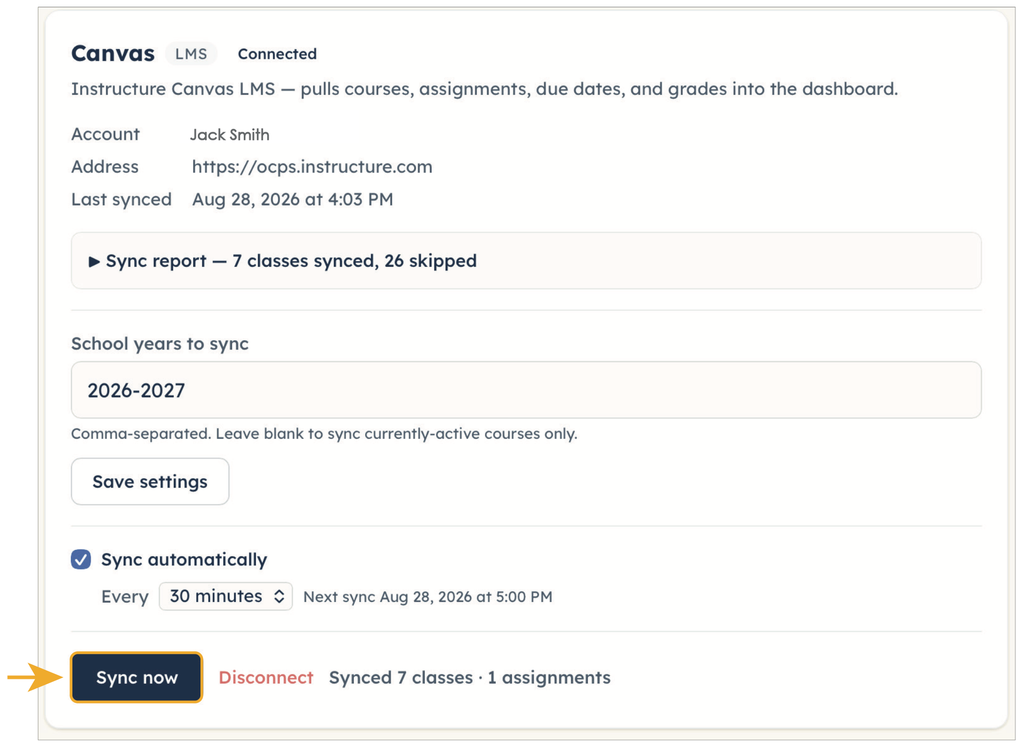
Now, return to the Clarity Space® screen you left open and paste the information into the section below. Complete the remaining fields on the form. Once finished, your screen should look like the example below. Then, click ‘Connect’.

Step 10
To complete the integration and confirm that your information is syncing correctly, click the Sync button.